
Here are a couple of examples from portraits I was influenced by. The top image is a detail from the portrait of Queen Elizabeth I when she was princess, and the second image is a detail from Holbein's Jane Seymour portrait.


Now, a couple of disclaimers: I am not claiming that this method is historically accurate (although I don't think there's anything that's necessarily ahistorical about this method), and I'm also not claiming that this method is the best way to go about trimming a kirtle. This is just what I ended up with, and it worked for me.
I had a few goals when I went about deciding how to go about doing this. I knew I didn't want to add the embellishment directly to the garment because I knew it would take quite awhile to bead a neckline's worth of detail, and I wanted something that could be removed and added to a different garment, if need be. I don't know if I'd actually remove this and add it to another garment, as the corners are mitered to fit the exact shape of this kirtle, but I could always untack the corners and shift beads around to fit a new corner, and that would certainly take less time and be less expensive than starting from scratch on a different garment. This was also appealing as my weight does fluctuate, and I wanted to be able to transfer the detail to a different sized garment in the future if I need to. In fact, between me starting the kirtle and now, I have put on some weight, so I'm not even 100% sure the kirtle will look correct under my gown. But I'm getting ahead of myself.
The other main goal I had with my trim was to be able to create a multi-dimensional design. I had both buttons and beads, with different sized openings and different heights. I wanted to be able to create my pattern both vertically and horizontally on the neckline.
Finally, I wanted something that would be sturdy enough that it could stand up to wear without me feeling like I had to be exceptionally delicate with it.
I decided to use a velvet backing for the neckline trim as I had scraps leftover from a decade-old project I could use, and I was using the same velvet (it was still available from the same supplier, 15 years after I originally purchased it!) on my gown's turn-backs. I thought the deep red would coordinate with my gown fabrics better than the orange of the kirtle, and would probably work better for potential future garments as well.
The first plan that I tested out was to create the beaded design using very flexible bead-stringing wire, and then stitch that down on the velvet. Unfortunately, the wire was not flexible enough to allow me to create tight clusters of beads, and in addition, much of the wire ended up being visible.
For my second attempt, I decided to bead the pattern directly onto the velvet using a beading needle and thread. Word to the wise: if you plan on using beading needles, make sure you have something to help you thread it. One of the flimsy threaders that are included in inexpensive sewing kits is sufficient. While I was able to create the pattern I wanted using this method, the velvet was too flimsy to support the weight of the beads.
Third time's a charm, right? I backed the velvet with two layers of canvas and beaded onto that, and it supported my design sufficiently.
From there, I finalized the design of the beads. Originally I was going to do a cluster of 4 pearls with my button "ouches" in between each cluster, but the shank of the button was so loose on the thread that it caused the button to slide around a bit, and the button also ended up covering much of the pearl cluster because of the height of the shank. I ended up getting some small pearls and kind of sandwiching the shank between four of the small pearls (two on each side). This helped both to secure the shank and keep it from sliding around so much as it was now sandwiched between the pearls somewhat tightly, and it also meant that the button was now covering these pearls rather than my decorative pearl cluster.
The other alteration to the beading design I made was to add a small gold bead in the center of the cluster of 4 pearls. It looked a bit empty without the gold bead in the center.
I'm happy with how the design turned out.

I am not an experienced beader so I don't know how much I can speak to specific beading techniques, but I will say the hardest thing for me was to keep the tension on the thread just right. It needed to be tight enough so as to not allow the beads to pull away from the fabric or slide around on the thread, but it couldn't be so tight that it distorted the design or caused beads to want to sit partially on top of one another. For the gold beads, I wanted those to sit a bit on top of the pearl cluster to create dimensionality and help cover the gap at the center, rather than to be pulled down tight to sit directly on the fabric, which would create a more 2-d design. I didn't get it perfect everywhere, but I did try to be aware of the thread tension as I went along.
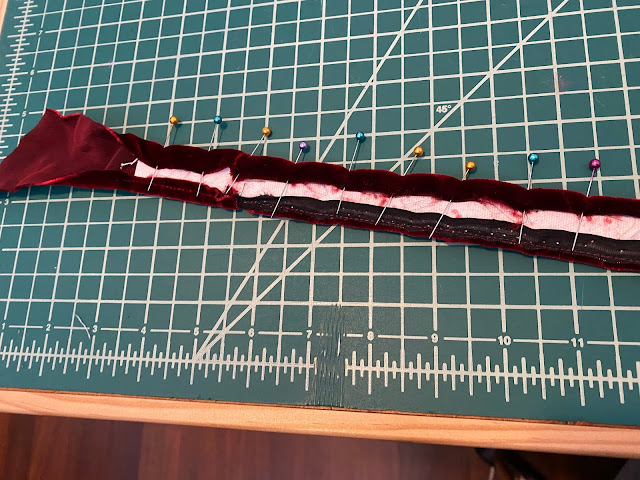
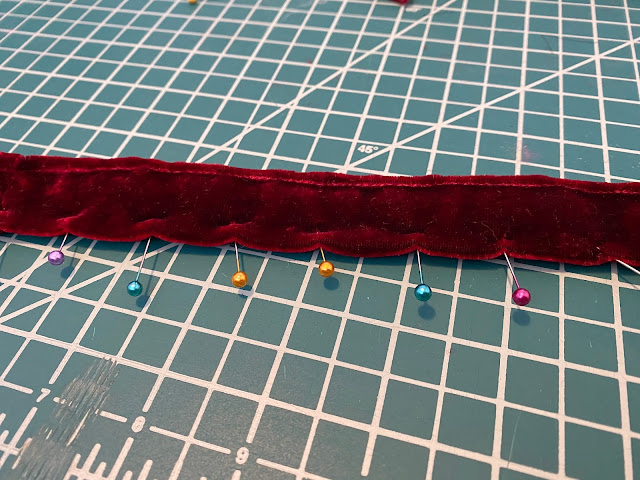
To make the velvet base for the trim, I measured the neckline of the kirtle and cut strips of fabric that were very slightly longer than it, as I needed extra length to allow me to create a 90 degree fold at the corners of the neckline, and I also wasn't sure how the weight of the beads would effect how the trim sat on the neckline. Better to have more length than you need than not enough. I then cut out a strip of canvas on the cross-grain that was twice as wide as I wanted my trim to be, and ironed it in half so that I had a 2 layered strip of canvas. I then cut a cross-grain strip of velvet the same length as the canvas, approximately the same width as the canvas, and then pinned that around the canvas and stitched close to each edge so that the velvet encased the canvas layers.
From there, I started beading a few inches in on the strip so that I could go back later and make sure each end would be at the same part of the motif, once I'd decided exactly how to place the trim on the neckline.
If I were to do this again, I'd probably try starting from the center point, so that I could control what section of the motif ended up at the center front. I'd still hold off on finalizing the center back edges until I was nearly done with the beading though.
I ended up knotting my thread fairly often as I beaded, because I did not want one snack or loose stitch to cause the entire thing to unravel. This also ended up being useful as I went back and unbeaded the areas that would end up being the corners and re-beaded them. I did it this way because, like I said, I didn't know if the weight of the beads would slightly efffect the length of the trim, and I was also unclear on how much length negotiating the corners would take. As it turned out, I don't think the beads effected how the trim sat on the neckline, so in the future I'd pin the unbeaded velvet strip to the neckline, fold it at the corners, and stitch that shape into place before beginning the beading. Learn from my mistakes!
After I'd finished beading the trim and incorporated my corners, I finished off each end, making sure I fudged the spacing a bit to have the pattern end at the same point on each side, and then finished the raw edges of the fabric base. I did the same sort of fudging at the corners as well so the beading didn't look incredibly awkward around them.
Finally, I pinned the trim in place around the neckline and tacked it down. I was careful to make sure that my stitching was strong enough to support the weight of the (very heavy) trim, but I didn't worry about making super tiny neat even stitches, since the stitches would not show on the outside, and since I intend for this to be removable. I also positioned the trim so that the upper edge went slightly above the edge of the kirtle so that the kirtle material would be a bit more hidden.

Overall, I'm satisfied with the way this turned out. I feel that there is room for improvement in my technique, but the method itself worked to create what I envisioned.