Saturday, August 8, 2020

Making a Neckline Biliment

I picked up my kirtle project after having abandoned it for quite awhile. One of the challenges I encountered while trying to finish the garment was puzzling over the best way to add the decorative trim (or biliment) at the neckline. I was surprised to find that, while I could find plenty of pictoral examples of what others had done, I could find very few how-tos. As someone who learns best from seeing something done, I thought I'd try to include a bit of information about how I decided to tackle this for the next person wondering what to do for a Tudor kirtle's biliment. I have been working from both the book The Tudor Tailor as well as Margo Anderson's Tudor Lady's Pattern. Neither resource had much guidance on the specifics of creating the decorative edge. I also did not find many good examples online of how to go about constructing this detail. 

Here are a couple of examples from portraits I was influenced by. The top image is a detail from the portrait of Queen Elizabeth I when she was princess, and the second image is a detail from Holbein's Jane Seymour portrait.
Now, a couple of disclaimers: I am not claiming that this method is historically accurate (although I don't think there's anything that's necessarily ahistorical about this method), and I'm also not claiming that this method is the best way to go about trimming a kirtle. This is just what I ended up with, and it worked for me. I had a few goals when I went about deciding how to go about doing this. I knew I didn't want to add the embellishment directly to the garment because I knew it would take quite awhile to bead a neckline's worth of detail, and I wanted something that could be removed and added to a different garment, if need be. I don't know if I'd actually remove this and add it to another garment, as the corners are mitered to fit the exact shape of this kirtle, but I could always untack the corners and shift beads around to fit a new corner, and that would certainly take less time and be less expensive than starting from scratch on a different garment. This was also appealing as my weight does fluctuate, and I wanted to be able to transfer the detail to a different sized garment in the future if I need to. In fact, between me starting the kirtle and now, I have put on some weight, so I'm not even 100% sure the kirtle will look correct under my gown. But I'm getting ahead of myself. The other main goal I had with my trim was to be able to create a multi-dimensional design. I had both buttons and beads, with different sized openings and different heights. I wanted to be able to create my pattern both vertically and horizontally on the neckline. Finally, I wanted something that would be sturdy enough that it could stand up to wear without me feeling like I had to be exceptionally delicate with it. 

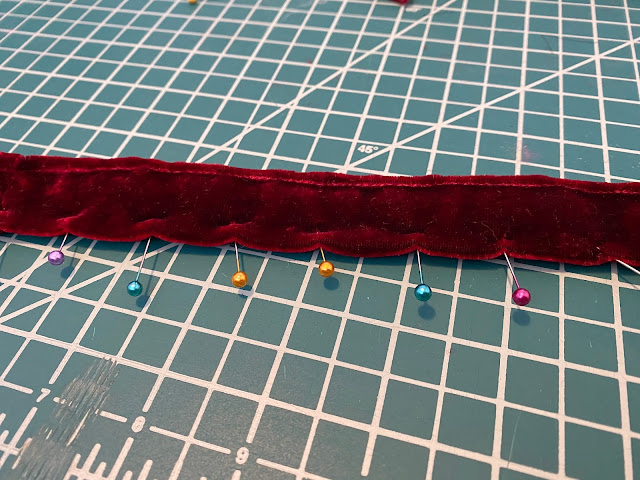
I decided to use a velvet backing for the neckline trim as I had scraps leftover from a decade-old project I could use, and I was using the same velvet (it was still available from the same supplier, 15 years after I originally purchased it!) on my gown's turn-backs. I thought the deep red would coordinate with my gown fabrics better than the orange of the kirtle, and would probably work better for potential future garments as well. 

The first plan that I tested out was to create the beaded design using very flexible bead-stringing wire, and then stitch that down on the velvet. Unfortunately, the wire was not flexible enough to allow me to create tight clusters of beads, and in addition, much of the wire ended up being visible. 

For my second attempt, I decided to bead the pattern directly onto the velvet using a beading needle and thread. Word to the wise: if you plan on using beading needles, make sure you have something to help you thread it. One of the flimsy threaders that are included in inexpensive sewing kits is sufficient. While I was able to create the pattern I wanted using this method, the velvet was too flimsy to support the weight of the beads. 

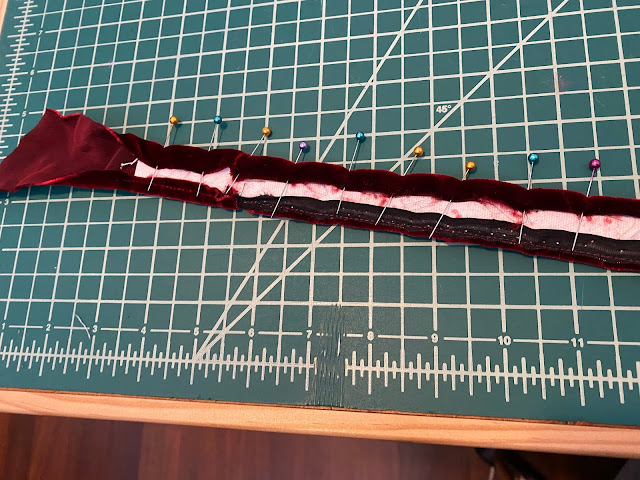
Third time's a charm, right? I backed the velvet with two layers of canvas and beaded onto that, and it supported my design sufficiently. From there, I finalized the design of the beads. Originally I was going to do a cluster of 4 pearls with my button "ouches" in between each cluster, but the shank of the button was so loose on the thread that it caused the button to slide around a bit, and the button also ended up covering much of the pearl cluster because of the height of the shank. I ended up getting some small pearls and kind of sandwiching the shank between four of the small pearls (two on each side). This helped both to secure the shank and keep it from sliding around so much as it was now sandwiched between the pearls somewhat tightly, and it also meant that the button was now covering these pearls rather than my decorative pearl cluster. The other alteration to the beading design I made was to add a small gold bead in the center of the cluster of 4 pearls. It looked a bit empty without the gold bead in the center. I'm happy with how the design turned out. 
I am not an experienced beader so I don't know how much I can speak to specific beading techniques, but I will say the hardest thing for me was to keep the tension on the thread just right. It needed to be tight enough so as to not allow the beads to pull away from the fabric or slide around on the thread, but it couldn't be so tight that it distorted the design or caused beads to want to sit partially on top of one another. For the gold beads, I wanted those to sit a bit on top of the pearl cluster to create dimensionality and help cover the gap at the center, rather than to be pulled down tight to sit directly on the fabric, which would create a more 2-d design. I didn't get it perfect everywhere, but I did try to be aware of the thread tension as I went along. 

 To make the velvet base for the trim, I measured the neckline of the kirtle and cut strips of fabric that were very slightly longer than it, as I needed extra length to allow me to create a 90 degree fold at the corners of the neckline, and I also wasn't sure how the weight of the beads would effect how the trim sat on the neckline. Better to have more length than you need than not enough. I then cut out a strip of canvas on the cross-grain that was twice as wide as I wanted my trim to be, and ironed it in half so that I had a 2 layered strip of canvas. I then cut a cross-grain strip of velvet the same length as the canvas, approximately the same width as the canvas, and then pinned that around the canvas and stitched close to each edge so that the velvet encased the canvas layers. 
From there, I started beading a few inches in on the strip so that I could go back later and make sure each end would be at the same part of the motif, once I'd decided exactly how to place the trim on the neckline. 

If I were to do this again, I'd probably try starting from the center point, so that I could control what section of the motif ended up at the center front. I'd still hold off on finalizing the center back edges until I was nearly done with the beading though. I ended up knotting my thread fairly often as I beaded, because I did not want one snack or loose stitch to cause the entire thing to unravel. This also ended up being useful as I went back and unbeaded the areas that would end up being the corners and re-beaded them. I did it this way because, like I said, I didn't know if the weight of the beads would slightly efffect the length of the trim, and I was also unclear on how much length negotiating the corners would take. As it turned out, I don't think the beads effected how the trim sat on the neckline, so in the future I'd pin the unbeaded velvet strip to the neckline, fold it at the corners, and stitch that shape into place before beginning the beading. Learn from my mistakes! After I'd finished beading the trim and incorporated my corners, I finished off each end, making sure I fudged the spacing a bit to have the pattern end at the same point on each side, and then finished the raw edges of the fabric base. I did the same sort of fudging at the corners as well so the beading didn't look incredibly awkward around them. Finally, I pinned the trim in place around the neckline and tacked it down. I was careful to make sure that my stitching was strong enough to support the weight of the (very heavy) trim, but I didn't worry about making super tiny neat even stitches, since the stitches would not show on the outside, and since I intend for this to be removable. I also positioned the trim so that the upper edge went slightly above the edge of the kirtle so that the kirtle material would be a bit more hidden. 
 Overall, I'm satisfied with the way this turned out. I feel that there is room for improvement in my technique, but the method itself worked to create what I envisioned. 

Friday, September 8, 2017

Grading the Kirtle Pattern

The next step after scaling up the patterns in the Tudor Tailor book is grading them to fit you. Unless your body measurements are the same as the measurements the pattern was designed to fit, you'll have to adjust the pattern since, unlike an already graded commercial pattern, there is only one size offered. I have never graded a pattern, so I relied on Missa’s instructions here: http://www.sempstress.org/demo/how-to-grade-a-pattern/. I highly recommend going over and glancing at her how-to in order to make sense of what's about to come. In fact, I highly recommend her site in general; she is a font of knowledge, and her explanations actually make sense.

Now, when deciding how much larger to make the pattern pieces, I found it a bit frustrating that the bust and waist were not indicated on the original pattern. I’m assuming the bottom edge of the kirtle bodice is meant to sit just at (or just above) the natural waist; the bust point, however, took a bit of guessing. The Tudor Tailor book indicates that the patterns given are meant to fit a 28” waist and a 36” bust.  My current body measurements are more like 39" at the bust and 30" at the waist. When trying to decide how to change the pattern, there were a few factors to take into consideration. 

Between the several layers of fabric and the boning, the finished garment's measurements will end up smaller than the pattern itself indicates, but I also want this garment to allow for just a little bit of squish. I’m not trying to waist-train with this, nor is the kirtle intended to do this, but I do want it to hold my body in the fairly rigid “conical” shape that is recognizably Tudor; it will need to be able to compress my bust and remain taut and rigid everywhere else. As a person with some squish, this necessitates a small amount of negative ease through the bust, and a very close fit at the waist. I also want to allow for a bit of stretch from wearing the garment, and perhaps a bit of weight loss as this has been the trend. Therefore, on this first go at a pattern, I chose to draft it to just my waist measurement instead of adding any ease, knowing it will end up slightly smaller than my current waist measurement after the addition of the boning. I also chose to factor in some negative ease through the bust, making it smaller than my actual bust measurement.

Next, I needed to decide how long to make the pattern. Going up in size, as Missa explains, also means adding length to allow the pattern to follow the curve of the body without coming up short. The way I make sense of this to myself is to imagine a car going over a small hill vs a large hill; the car has to travel a longer distance to get over the large hill. This is assuming that the pattern is already the correct proportion for your height. However, this isn’t exactly a pattern piece with a lot of curve; it’s going to smoosh the body rather than conform to the curvature of the bust and waist, which to my mind means the length won't have to change so drastically, as it's not going from having a small hill to travel over to a large hill to travel over; there aren't really any hills in this pattern. So, I determined how long I wanted the bodice front to be (or perhaps a better way of thinking about this is how far above the waistline—the bottom of our pattern—do I want the kirtle neckline to sit), and how long I need the side seams to be so that the side of the garment does not cut into the armpit. Recall, too, that this is a garment meant to be worn under another fully-constructed gown. Therefore, I want enough space in the armscye that I can have another sleeve on over it without that feeling too bulky, so I want to make doubly sure that this isn’t digging.

With all of these factors in mind, I measured my pattern pieces so I could decide where make my changes. The bust (or at least where I guessed the bust would fall…) is approximately 34 inches (so we’re assuming that the pattern is accounting for some negative ease since it's supposed to fit a 35" bust- further supporting my plan), and the waist measures to 28 inches-- exactly the waist measurement the garment is meant to fit. The center front is 11” long and the side seam is 7”.  I am pretty sure my front needs to be more like 8.5”-10.5” depending on how much my bust gets “smooshed” upwards, and the side needs to be more like 5.5”. I very unscientifically determined this by putting the base of my clear ruler at my waist and holding it close to my body, mimicking the flattening of the bust the kirtle should provide, and looking in a mirror to decide where I'd like the neckline. I chose to actually shorten my pattern rather than lengthening it as I graded it up, knowing that I can adjust further on my mockup if need be; I suspect I may have to adjust where the neckline sits, and I think I’ll definitely end up widening the neckline and adjusting the angle of the straps.

First, I cut open a paper bag and laid my pattern pieces on top of it. The brown paper bag will end up being the "extra" inches in my pattern. 


I needed to add 3” to my pattern pieces at both the waist and the bust, which makes this a bit more straightforward; I didn't need to slash and spread, as illustrated in the Tudor Tailor; rather I just needed to add the same amount all around. If you are proportionally larger at the bust or waist than the patterns, you'll have to adjust your patterns at an angle, rather than the straight lines you'll see in my illustrations. You may still need to separate the sections of the pattern completely as I have, rather than just slashing like the illustration shows, depending on your body size.


The Tudor Tailor's illustration of the slash and spread method

I just eyeballed where I made the marks to cut based on where I thought I’d be the most likely to not negatively affect the line of the waist or neckline. I also made a horizontal line just above the waist from which to shorten the pattern. This is a bit harder because I want to adjust the length of the side and the back more than the front, and I cannot slash and spread horizontally without completely messing up the pattern; this adjustment may need to be made by redrawing the waistline and the neckline once I have the pattern at the correct circumference. To start with, though, I ended up angling the bottom pieces slightly so that I shortened the pattern on the side and not the front; I have a more extreme dip at the waistline than the original pattern as a result. 


Because the back of the pattern was being shortened a uniform amount across the pattern, I simply folded it. It's upside down in the picture, but I folded just above the waist; you could see the shadow of the fold more clearly if I took the picture from this angle, though. 


I know that I will need the bulk of the extra inches in the front of the pattern to accommodate my bust; I have a relatively narrow back and ribcage, my fullness is in my bust. Therefore, I wanted to add just 1 inch at the back, and 2 inches in front, increasing the pattern measurements to 31” at the waist and 37” at the bust. This will be smaller than my bust measurement, but as discussed, I want to leave some room for squish. I’m just guessing that this will fit, of course—I’ll need to wait until my mock-up to see if these guesses were accurate to my body.

Because I was only working with half of the pattern, this meant adding .5” to the back pattern piece and 1” to the front pattern piece. These measurements needed to be distributed across the cuts I made to enlarge the pattern. Because there aren’t darts, princess seams, etc… I made only 3 points at which to add fullness, one on the back piece and 2 on the front piece. So, I spread the back piece by .5” and each line on the front was spread by .5” to add up to the full 1.5”. That way, the finished garment will be 3" bigger all around.

Once my pieces were spread and shortened, I taped them in place, and cut out the new, larger and shorter (gee, doesn't that sound flattering?) pattern. 


Hopefully this makes sense! I think actually going through the steps helps clarify things, so if you're finding yourself in the position to grade a pattern, my best advice is to just get in there and do it. Keep in mind that I'm just guessing on a lot of things; this pattern is very much a draft, and I'm using my own experience and knowledge of my body and how I often have to alter garments to make educated guesses on how to adjust this pattern. We won't find out until I make a mock-up whether or not I was totally off, so it's best to think of this iteration of the pattern as the first draft of several.

Next up, see how I plan on adjusting this first draft of my pattern to fit me more accurately!

Friday, September 1, 2017

Scaling Up the Tudor Tailor Pattern

After I decided my shaping garment was going to be a kirtle, that left me the task of actually obtaining a kirtle pattern-- not as straightforward a prospect as I wish it were. With no commercially available pattern, I was left with a few viable options:
-Draft my own
-Enlarge and alter the pattern from the Tudor Tailor book
-Order the pre-graded, pre-enlarged Tudor Tailor kirtle pattern
-Order Margo Anderson's Tudor pattern

In the end, I chose to enlarge and alter the pattern from the Tudor Tailor book for a few reasons. I quickly ruled out ordering a new pattern, as it felt wasteful when I knew I could work from the Tudor Tailor book, which I already own, with just a little more time and effort and save myself some dollars. I considered drafting my own pattern, and really honestly thought this was the route I'd likely go for awhile. I was afraid of having to work forever to tailor the Tudor Tailor pattern to fit my body perfectly, but when I realized my proportions were the same as the proportions the patterns were drawn for-- I'm 5'4" and they were designed for someone between 5'2" and 5'6", according to the patterns, and I am the same proportion but 3" bigger all around than the measurements the patterns are intended to fit-- I decided that it might be faster and less painful to simply grade up the pattern. Especially when I was facing the prospect of drafting a new block, altering that draft to get it to fit me perfectly, potentially altering that again, and then drawing a kirtle pattern from the block and having to fit that pattern as well.

Part of why I was intimidated by working from the Tudor Tailor patterns is that I don't have a lot of experience working from a pattern out of a book; that is to say, enlarging a pattern, altering it to fit, and then constructing a garment with fewer instructions than are provided in a commercial pattern, especially a garment that may have techniques I'm not familiar, or at least not comfortable with. Once I knew I was going to work from the Tudor Tailor book for this garment, I decided to try my darnedest to blog about my experience, since I searched high and low for a step-by-step description of the process, and couldn't find one that broke the steps down in a way that made it seem conquerable. I'm not going to presume that this account will do that, but I figured I would at least attempt to pave the way for those coming after me. I know I love having a step-by-step account with pictures of how to do something.

I started with some fantastic paper with a 1" grid marked on it. This made my task a lot more helpful, and I don't recommend scaling up a pattern without this, unless you have another means to make sure your shape is accurate (like a projector). I bought mine years ago, so forgive me for not having more information about where to get it, but it's a huge roll of lightweight paper with marks at every inch. Some wrapping paper has a 1" grid on the back, and I'm sure paper suitable for drafting is available online.  I used a bit of paper leftover from another project that was super crinkled, so you'll have to forgive that in the photos. Luckily, it did not impede my task.


In order to begin scaling up the pattern, I counted out the tallest and widest points of the pattern and marked the halfway points for reference. For instance, on the kirtle bodice front, the tallest point of the pattern is 11” and the widest is 20”. I then drew a rectangle with half of those dimensions, so in this example 10” by 5.5”. I only drafted half of the front pattern, as this is hand-drawn and I want to end up with symmetrical curves at the neck and waistline; I will cut it on the fold.  

faaaaaaint box to draw my pattern in
Once I had my rectangle drawn, I counted in from the outer corners to find where the corners of my pattern would be, and then connected the dots with either straight or curved edges, as indicated on the original pattern. For the curved edges, I tried as best I could to mimic the shape of curve shown on the original. 
two dots! These will be the bottom curve of the armscye
Arc drawn
The outline of the pattern
 Once I had the outline of the pattern, I went ahead and added my seam allowance. I still have to grade the pattern up to my size, but I just knew it would drive me crazy to not be able to see both the edge of the pattern piece as well as the cutting line as I move forward, even though I know I'll end up having to re-draw these on my final pattern; remember, this is essentially a draft that will need to be graded up as well as altered to fit my body. To do this step, I used my handy-dandy clear ruler (seriously, where has this been all my life?) to line up the .5” tick with the line of the pattern and make marks to indicate where my cutting line will be. 


Beginning to add my seam allowance...

Seam allowances added! Notice, no seam allowance at the center front, as this will be cut on the fold.

And it looks like a pattern!
What you’ll notice missing on my pattern are the lines to indicate boning placement; I plan on drawing these directly on the fabric where I will stitch the channels.

I used the same method to draw the kirtle back piece; Because there were longer arcs on this one, I counted a few points on the grid in the book and transferred these dots onto my pattern so I had a better idea of what points my curve needed to pass through in order to copy the shape accurately. And that, my friends, is the method I used to scale up the Tudor Tailor patterns!

Next step: grading the pattern! 

Promises, promises

So, as you may have noticed, every couple of years I recommit to being a Good Blogger and getting back into the swing of things, but then I fall off the wagon and feel too guilty to get started up again, since I know history will probably repeat itself and I'll still suck at blogging.

The cycle ends here!

Not the sucking at blogging part. I will probably always suck at blogging. The guilt. I am giving myself permission to blog sporadically without the associated guilt.

So, back to why you guys are reading this. I sew things! Sometimes. You (presumably?) like to read about people sewing!

I ended up losing enough weight that I don't think I can salvage much of my old corset or bodice, and I've decided I'd like to do things a bit differently this time around, anyway. I did some research to try to tighten up my plan, and realized there simply weren't enough step-by-step Tudor dress diaries for my liking, although there are lots of inspiring finished ensembles out there. So, with that in mind, I'm going to try to record as much of my process as I can in the hopes that it will help someone else out along the way. There are sure to be mistakes and missteps along the way, but hopefully you nice people out there can learn from them and not make them when it's your turn.

I spent an ungodly amount of time looking at Tudor portraits and decided the way to do this thing is to build a kirtle and a gown. I'd originally decided against this because, first off, I felt (and still feel) that a separate corset is more practical as it can be worn with more outfits. Also, I frankly didn't think that the silhouette produced with a separate kirtle and gown was always accurate to the portraits, especially around the neckline. The issue I had with the Tudor Tailor patterns specifically is that the neckline didn't look open enough once the gown was layered on top of the kirtle. However, after looking at lots of portraits and thinking through how things could potentially be done, I don't think the look is rigid enough to call for a separate corset, and now that I am convinced a kirtle would be worn regardless of whether it was the stiffened support layer or not (although historical evidence points to the fact it probably was if any layer was in fact stiffened, since separate bodies don't really appear in clothing inventories until later), it seems as though it would be difficult to get the kirtle and gown to sit in perfect alignment if the kirtle did not have all that much structure.

To combat my concerns with the Tudor Tailor neckline problem, I think I'm going to try making the kirtle neckline wider, and not build a strap on the bodice; it looks as though the sleeve of the gown is just sewn onto the bodice under the arm and in the back. I wrote this 10-page long, stream of consciousness treatise in my personal sewing diary on why I think that is the case and how I think I'd like to put this thing together, but I'll spare you the gory details.

Here's what it boils down to: in both the Katherine Parr and Princess Elizabeth portraits from the late 1540's, you can see the gown's trim peeking out both at the split skirt edge and at the neckline below the jeweled trim. It's harder to see if the jeweled trim is applied on a contrasting fabric in Princess Elizabeth's portrait, but in Katherine Parr's, it's applied on a red background, not the gown's cloth of silver. I take this to mean that the jeweled trim must be attached to a separate garment, not merely mounted onto a contrasting fabric and applied to the gown itself, as it is above the gown's top edge as indicated by the appearance of the lining. Take a look. Both of these should get big if you click on them; on Princess Elizabeth's gown, you're looking at that thin solid red line, and on Katherine Parr's, you're looking at the tufts of fur.

The original can be found here: https://d9y2r2msyxru0.cloudfront.net/sites/default/files/collection-online/1/8/329955-1350464449.jpg, this version cropped by me. Also, I just noticed that the brooch pinned onto the gown is off-center... Count the gold pieces on the billament at the neckline...

The original portrait can be viewed here:https://www.sudeleycastle.co.uk/wp-content/uploads/from_server/Postcards/postcard17parrportrait.jpg I cropped this version. 

See what I mean? If you look closely, you'll also see that the same lining is visible on the sleeve near the neckline, and the sleeve is clearly not set into a strap, as indicated by the unbroken pattern of the fabric on the sleeve (Tudor's weren't big into pattern matching). In fact, it's just barely hanging off the shoulder, and the visible "strap" is the neckline of the kirtle. So, this is what I'm going to attempt to emulate; a very wide kirtle neckline and a sleeve that is held up by the back of the gown and the sheer force of my will alone. We'll see if this works or not. If it does, I think it will get a neckline that is very close to the Tudor silhouette of the late 1540's; if it doesn't, then I'll add a strap or try something else.  

Wednesday, October 21, 2015

I'm Back...!

Hi All,

Wow, ok, so two years went by. That happened. Sure, I've been sewing on and off, but I'm REALLY bad at keeping updated, if you guys haven't noticed. Sorry about that. But I'm compelled to try to keep up at this, if for no other reason than keeping a record for myself. If someone else finds this useful or interesting, then all the better!

So, I just made a Halloween costume that I wore to Mickey's Not So Scary Halloween Party in the Magic Kingdom. That was pretty neat! I'll try to write up a post on it once I get some pictures; there are (as usual) things I'd change if I did it again, but overall I think it was successful for what I needed it for.

I'm trying to ride the momentum of that project and get back into my big Tudor project. That ended up getting put on hold for a few years... Funny how that happens. I didn't have an event to wear it to that would give me a deadline, and sometimes life just gets in the way, you know?

Well, the corset is now too big and I don't think it's alterable. I've started working on a replacement for it, and then I'll know the bad news about the gown's bodice. Spoiler alert: I think it's going to need a lot of work to fit over the new corset. So we'll see how that goes. I probably should just start over, but I don't have enough of the brown gown fabric to do that, and it's been discontinued.

At any rate, I thought I'd swing by and give a bit of an update! What projects have you guys been working on? Anything for Halloween?


Friday, July 19, 2013

An Update!

Hi guys,

Long time no sew! I have been busy busy at my new job working at a bridal gown shop, and it hasn't left me much time (or energy) to work on my own sewing projects. I also haven't made too much progress on my sewing room, which will make it much easier to keep ongoing projects instead of just powering through something in a week or two in order to get the mess out of my living room!  Working at a bridal shop has afforded me a great opportunity to look at how wedding gowns are constructed, and I've gotten to help make minor repairs (no alterations!) to the gowns; redoing beading, fixing tacks that have come undone on pickups and ruching, etc... It's also been really fascinating to see the seamstresses who do alterations work. One of the seamstresses used to teach design at the University level and is an extremely talented designer and seamstress, so she comes at the alterations from a very different perspective. She's also FAST and has been making me rethink a lot of my methods. For instance, she laughs at me for being as cautious as I am; she says cutting out a pattern should take an hour. She told me she tells her students to never do mock-ups; just cut a little bigger and alter it on yourself! It's neat to think about sewing from a completely different perspective.

In other news, I am working on a new project! I am going to a couple of weddings this summer and I have absolutely nothing to wear (this is an exaggeration; I don't want to wear any of the things I have). I decided to start working on Butterick's B5814, a vintage-styled wiggle dress.

B5814

 I plan on tweaking the sleeves a tad and playing with the proportions of the drape on the skirt. I really wanted to make it in a deep wine color or a dusty blush pink, or maybe even a nice rich emerald or forest green, but alas, my fabric store was lacking;  I ended up coming home with a deep red silk dupioni. It's a beautiful cut of fabric, but a little vampier than I would have preferred for a wedding.  And who knows, with my cramped schedule, I may not even have time to finish it before the weddings I have to attend. It looks deceptively simple; the bodice is constructed like that of a strapless dress since the sleeves sit right on the tip of the shoulder and cannot support weight without slipping right off. It has boning in the bodice and an inner waistband to keep the dress anchored at that point.

So, wish me luck! What are you guys working on right now? Do you find it difficult to find the time to sew?

Thursday, September 13, 2012

A Necklace Fit for a Queen (or a Princess, at least...)

For as long as I can remember having planned my Tudor gown project (I think it started in 2007, perhaps?) I have wanted a necklace like the one Elizabeth I wore in the portrait she gave to Edward before she became queen. It was a double-stranded affair with alternating pearls and gold beads. However, I also loved Anne Boleyn's "B" initial necklace. I always thought it was playful... dare I say flirty? I guess there's something about seeing all of these anonymous portraits, and then you get to hers and see a woman who does not want her name lost in history, and who is proud of her family. An early modern woman who doesn't feel defined by her married name, but who proudly boasts the name she was born with. Maybe I'm projecting here, but I want to explain why this is a personal project for me, and not just a simple reproduction. I really like the idea of what the pendant represents.

Not that Princess Elizabeth's necklace doesn't resonate with me as well; I think it is one of the most compelling portraits of her in existence. She is young, not yet Queen, but looks incredibly bright. And it was a tender gift to a brother she loved and would soon lose to death.

Princess Elizabeth, thank you Elizabethan Portraits!


And here's one of the Boleyn portraits featuring the pendant. There are several; some, including this one, may be posthumous copies.


Once again, thank you Elizabethan Portraits! 

I used glass beads and gold-plated beads to make the necklace. I made two strands and attached both strands to the same clasp, which had loops on it to accommodate up to three strands. The clasp is shaped like a little Tudor rose! I've been hanging onto it for years in anticipation of this project.


As you can see, I do need to get better at attaching my strands to the clasp. I am very bad at looping the small bits of stringing material through the loops on the clasp, and so I ended up with more un-beaded stringing material than I wanted, and then I had a couple of dodgy goes with the crimps, so I added a second one just in case....

 I threaded the glass pearls and gold beads on two strands that I measured to the length I wanted them. I believe the glass pearls are 8 mm and the gold beads are 6 mm. Both are from Fire Mountain Gems.  I think I may have made the choker length a little longer than ideal, but oh well. I think it is probably close enough that I'll be happy with it.

The two-strand necklace before the pendant was attached.
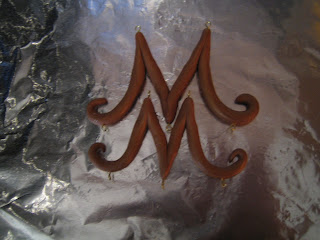
For my initial pendant, I used polymer clay that I shaped with my hands (ugh, hello fingerprints and fingernail indentations!). If I were to do this again (in fact, I might), I would definitely research some tools to help with this part of the procedure. For now, I think it was a good start, and since I'm in a bit of a hurry with this project, my prototype will do for now. I cut some headpins and pressed them into the clay before I baked it; the ones on top were attached to jump rings and attached to the shorter strand of my necklace, and the ones on the bottom will eventually be used to attach some dangly beads, but it turns out teardrop shaped red faceted glass or glass pearls are hard to find locally... I'll have to place an order online.

I made two clay pendants; the first one was much larger than I wanted. The second isn't too much smaller, but it's enough of a change that it looks a lot better. I don't think with my current molding skills, I'd be able to get one much smaller than what I have! I'll have to practice some more.


After it was baked, I painted the front and sides of the pendant with some gold leaf paint that had scary warnings on it. After reading the warnings thoroughly, I decided it was best to leave the backside (which will lay against my skin) unpainted.

The metallic paint I used.
 Here's the pendant right after I painted it:


And here it is attached to the necklace:


I've been working on my bodice... I may finally have some pictures of garments on my body soon! I've got a lot of mostly finished pieces, but once I have the bodice constructed and the skirt attached, I'll be able to hem my petticoat and make my smock without worrying about its neckline not matching the bodice neckline. I am probably over thinking all of this, but I'm not used to making quite so many pieces that have to work in tandem with each other. I'd rather be overly cautious until I'm omre familiar with the process.